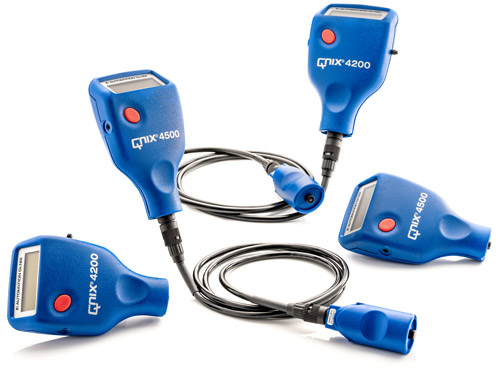
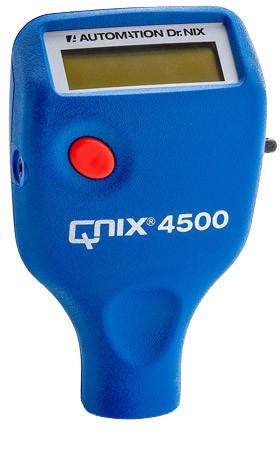
QNix® 4500, QNix® 4200

The coating thickness gauges in the 4000 series from QNix® provide you with precise and fast measurement results, are easy to operate – and extremely robust
Are you looking for a universal and proven coating thickness gauge? Do you not need a measured value memory or software-supported evaluation for your area of application? Then the QNix® 4200 for measurements on Fe or the QNix® 4500 for measurements on Fe and NFe is the right coating thickness gauge for you.Reliable measurement results for Fe and NFe
Thousands of users around the world have been using the coating thickness gauges in the 4000 series for years. As a user, you can also benefit from these successful models. The QNix® 4200 provides you with reliable measurement results on steel and iron (Fe). The QNix® 4500 can be used to measure steel, iron (Fe) and non-ferrous metals (NFe) such as aluminum, zinc, copper or brass.Wide range of applications and “easy-to-use”
Devices from the QNix® 4000 series are available in various versions, for example with an integrated or cable probe or with an extended measuring range of up to 5 mm. This allows you to cover a very wide range of applications if required. We want to make your work easier as a user. That’s why every QNix® coating thickness gauge works according to our easy-to-use principle: set up, measure, read off.All QNix® benefits at a glance:
- Simple: put on – measure – read off
- High accuracy and precision
- Simple zero point adjustment
- Durable ruby measuring head tip
Product information
Are you interested in our coating thickness gauges?
We will be happy to send you a non-binding offer.
QNix® 4500 / 4200 in detail
Standards met
DIN EN ISO 2808 ISO 2178 ASTM B 499 ASTM D 7091 ISO 2360 (QNix® 4500 only)Operation
Automatic switch on/off One-hand and one-button operation Only one function key Manual and automatic substrate changeover (QNix® 4500)Application advantages
Optimum readability – large digits Readability in the dark and in sunlight – backlit LCD For everyday use – ergonomic design with recessed grip Protection of the measuring probe and the surfaces to be measured – Polished ruby measuring head tip
Our range of probes for the QNix® 4200 / QNix® 4500
| Probe | Measuring range | Substrate | Deviation |
|---|---|---|---|
| QNix® 4200 3 mm | 3000 µm | Fe | +/- (3% +- 2 µm) |
| QNix® 4200 5 mm | 5000 µm | Fe | 0 – 1999 µm: +/- (3% +- 2 µm) 2000 – 5000 µm: +/- (5% +- 2 µm) |
| Smallest measuring surface | Smallest radius of curvature | Smallest thickness of the substrate |
|---|---|---|
| ∅ 25 mm | Convex: 5 mm Concave: 5 mm | 200 µm |
| Probe | Measuring range | Substrate | Deviation |
|---|---|---|---|
| QNix® 4500 3 mm | 3000 µm | Fe & NFe | +/- (3% +- 2 µm) |
| QNix® 4500 5/3 mm | 5000 µm 3000 µm | Fe NFe | 0 – 1999 µm: +/- (3% +- 2 µm) 2000 – 5000 µm: +/- (5% +- 2 µm) |
| Smallest measuring surface | Smallest radius of curvature | Smallest thickness of the substrate |
|---|---|---|
| ∅ 25 mm | Convex: 5 mm Concave: 5 mm | 200 µm |
QNix® 4200
Universal measuring device for FE substrates without measured value memory. Ergonomic, backlit, fast and robust.
QNix® 4200
Universal measuring device for Fe and NFe substrates. Simple change of measuring method (automatic/manual).
| Funktionen | QNix® 4200 | QNix® 4500 |
|---|---|---|
| Hintergrundbeleuchtetes LCD | ✓ | ✓ |
| Akustische Messbestätigung | ✓ | ✓ |
| Automatische Substratumschaltung | ✓ | ✓ |
| Manuelle Substratumschaltung | ✓ | ✓ |
| Einheitenumschaltung µm/mil | ✓ | ✓ |
| Nullpunktjustierung auf Referenzplatte | ✓ | ✓ |
| Messungen auf FE | ✓ | ✓ |
| Messungen auf NFe | ✓ |

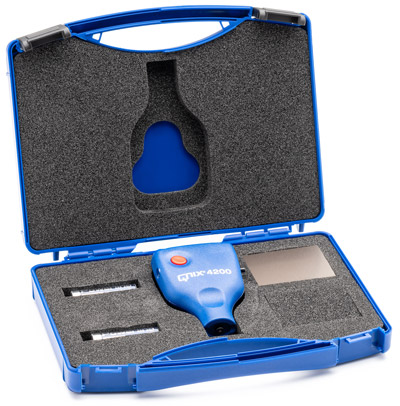
Scope of delivery QNix® 4200 and QNix® 4500
QNix® 4200 and QNix® 4500 at a glance
| Messprinzip | Zwei magnetische Messprinzipien Fe: Magnetfeldänderung bzw. Hall Effekt siehe Fe* NFe: Wirbelstrom siehe NFe* (nur QNix® 4500) |
| Nach Norm | DIN EN ISO 2808, ISO 2178, ASTM B 499, ASTM D 7091 ISO 2360 (Nur QNix® 4500) |
| Einheitenumschaltung | µm/mil |
| Messzeitabstand | Einzelmessungen: 850 ms |
| Messwertanzeige | von 0 – 999 in µm, ab 1000 µm in mm |
| Anzeigeauflösung | 1 µm im Bereich von 0 – 999 µm 0,01 mm im Bereich ab 1000 µm |
| Anzeige | Hintergrundbeleuchtetes LCD |
| Betriebstemperaturbereich | 0 - 50° |
| Zulässige Lagertemperatur | -10° C - 60° C |
| Stromversorgung | 2 x Batterien 1,5 V (Typ AA Alkali) |
| Abmessungen (L x B x H in mm) | 100 x 60 x 27 (Gerät mit integrierter Sonde) |
| Gewicht inkl. Batterien | Gerät mit integrierter Sonde: 105 g Gerät mit Kabelsonde: 147 g |
Fe* Measurement of non-ferromagnetic or non-ferromagnetic coatings on ferromagnetic substrates, for example:
Measurement on iron or steel substrate NFe* Measurement of non-ferro or non-ferrimagnetic and non-electrically conductive coatings on non-ferro or non-ferrimagnetic and electrically conductive substrates, for example: measurement on aluminum, zinc, copper or brass substrates.
Subject to technical changes
Are you interested in our coating thickness gauges?
We will be happy to send you a non-binding offer.

